12345 Blackmagic cameras have become hugely popular among independent filmmakers and videographers recently. They are known for their ability to shoot high-quality videos at affordable prices. Some key features of Blackmagic cameras include:
- Shoot a high-resolution video up to 6K
- Record to common media like SD cards and SSD drives
- Support for RAW and ProRes formats
- Excellent dynamic range
- Compact size and lightweight body
- Intuitive touchscreen interface
- Compatibility with EF lenses
My Personal Experience
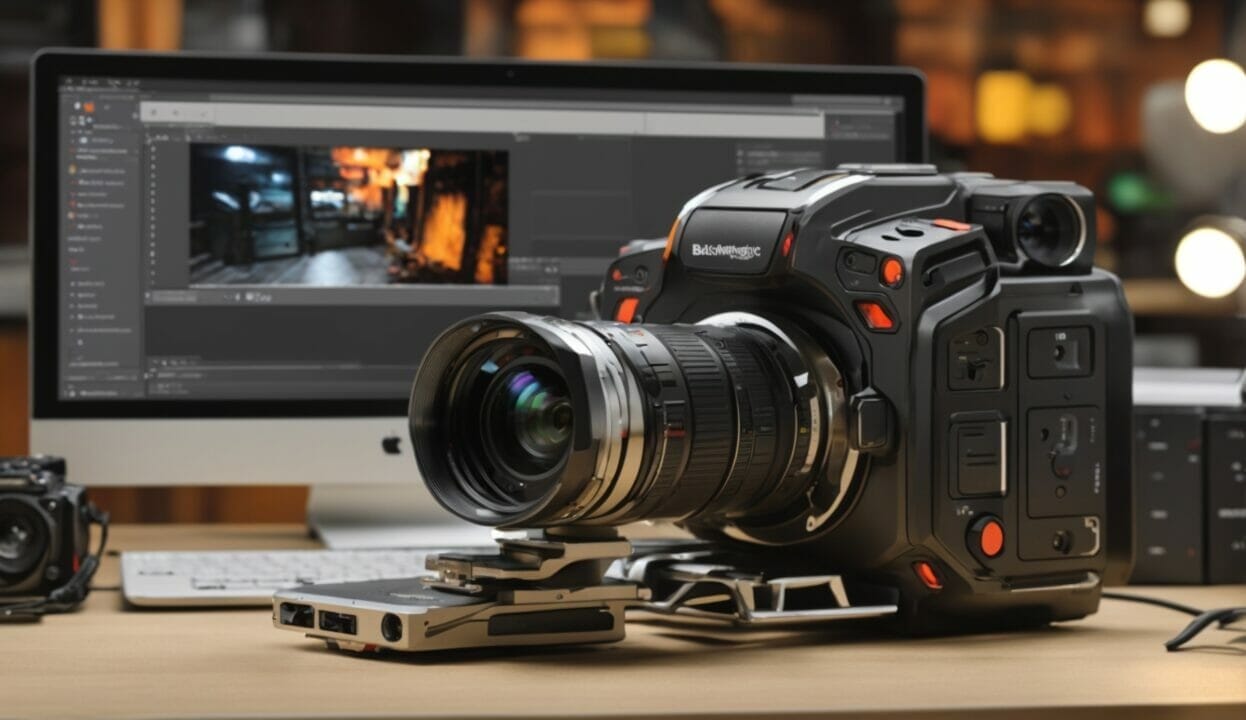
I’m John, an aspiring filmmaker who recently purchased the incredible new Blackmagic Pocket Cinema Camera 6K Pro. As a budding cinematographer, I was drawn to the Pocket 6K Pro’s large Super 35 HDR sensor, 13 stops of dynamic range, and dual native ISO up to 25,600 for capturing stunning cinematic shots. However, after an intense day of filming on location, I realized I needed to learn how to offload properly and back up my RAW and ProRes footage.
The process seemed straightforward after skimming the quick start guide and watching a few YouTube tutorials. First, I made sure my camera was powered on and connected to my laptop via the USB-C cable that came included. Once connected, the Pocket 6K Pro appeared as an external drive on my Mac.
Next, I opened the Blackmagic RAW Speed test app, which automatically detected my camera. I selected the clip or folder I wanted to transfer in the app and clicked the “Copy to Disk” button. The transfer speed was lightning-fast thanks to the USB 3.2 Gen 1 connection.
With my footage copied over, I ejected the camera drive and opened up the folder containing mine.BRAW clips. I was amazed by the image quality and dynamic range preserved in the 12-bit Blackmagic RAW format. The flexibility to adjust exposure and color in post without any quality loss is a real game changer.
I copied the files to a portable SSD drive to back up my footage. The extremely small file sizes of Blackmagic RAW allowed me to fit hours of 6K footage onto a 1TB SSD. I can’t wait to start editing and color grading! Let the post-production fun begin.
Blackmagic offers several camera models, depending on your needs and budget. The Pocket Cinema Camera line is designed for portability and travel. The URSA Mini cameras offer more robust pro-level features like interchangeable lens mounts. And the Studio Camera models are optimized for live production and streaming.
Importance of Transferring Files from a Blackmagic Camera
When you record video on your Blackmagic camera, the files are stored internally on a memory card or disk drive. So to edit or share your footage, you need to transfer these video files from your camera to a computer.
Some key reasons why regular file transfer is important include:
- Free up space on your camera’s internal storage for new recordings
- Back up your footage to prevent data loss
- Allow you to edit your videos using professional software
- Share clips with clients and collaborators
- Archive important projects
- Convert RAW footage into friendlier formats
Transferring your Blackmagic files to a computer gives you more flexibility and security. So it’s recommended to get into the habit of offloading footage after major shoots or when your camera storage is full.
Understanding the File Systems in Blackmagic Cameras
Types of Files Captured by Blackmagic Cameras
Blackmagic cameras can record video in a variety of professional formats. Here are some of the common file types you’ll be transferring from your camera:
- RAW – Uncompressed video that preserves maximum image quality. Requires more storage space.
- ProRes – An intermediate codec that maintains high quality while reducing size.
- DNxHD/DNxHR – Another popular intermediate codec used for editing.
- EXR – A high dynamic range format that stores scene metadata.
- JPEG – A compressed image sequence sometimes used for stop motion.
RAW and ProRes will be the most common formats when shooting video. The type of files your Blackmagic camera uses will depend on the specific model capabilities and your recording settings.
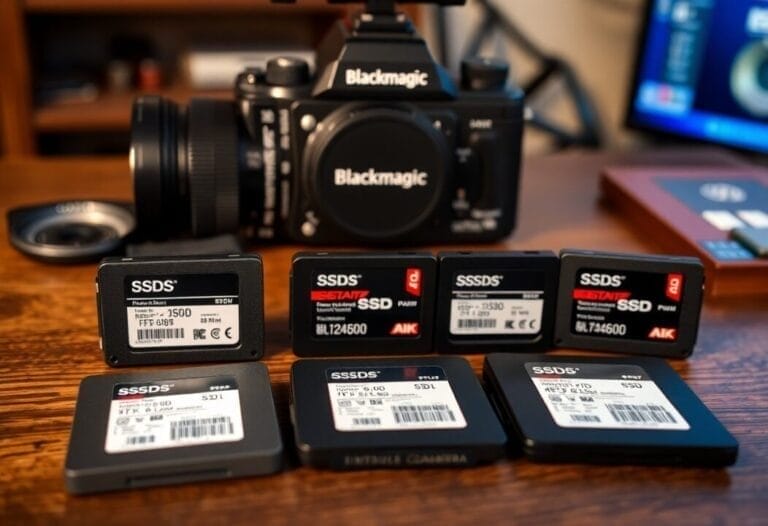
Explaining CFast Cards and Their Role in Storing Files
Many Blackmagic cameras use CFast cards as their internal recording media. CFast 2.0 cards are a high-speed solid state storage solution designed for capturing video.
Here are a few key advantages of CFast cards:
- High read/write speeds to support video recording.
- Durable form factor resistant to vibration, shock, etc.
- High storage capacities up to 512GB.
- Trusted performance for recording RAW and ProRes footage.
When you insert a CFast card into your Blackmagic camera, it will automatically save all your video files to that card’s storage. The card fits entirely within the camera body for protection. Then when ready to offload, you remove the card and plug it into a computer for file transfer.
Preparing Your Equipment for the File Transfer
Identifying Necessary Hardware: Computer, USB, CFast Card Reader
To transfer files from your Blackmagic camera, you will need the following equipment:
- Computer – A Mac or Windows PC with enough storage space for your video files.
- USB Cable – For connecting the card reader to your computer.
- CFAST Card Reader – An external device that plugs into your computer to access the CFast card files.
Some newer computers have built-in CFast card slots, but an external USB 3.0 card reader offers wider compatibility. The card reader will allow your computer to interface with the CFast card once it’s removed from the camera.
Setting Up Your Computer for File Transfer
To prepare your computer for the file transfer process:
- Ensure you have plenty of free storage space on your computer to transfer the video files.
- Organize a designated folder on your computer where you want to save the footage.
- Have the CFast card reader plugged into an available USB 3.0 port on your computer for the fastest transfer speeds.
- Install any necessary software drivers for the card reader if needed.
- Disable any auto-import settings that could slow the transfer.
- Close any other programs using bandwidth so the transfer is allocated maximum resources.
Taking these steps beforehand will help ensure a smooth, uninterrupted file transfer process.
Step-by-Step Guide to Transferring Files From a Blackmagic Camera
Step 1: Safely Removing The CFast Card From The Camera
Once you’ve finished recording all your video footage, the first step is to remove the CFast card that contains your files from the Blackmagic camera. Here’s how to do this safely:
- Locate the CFast card slot on your camera. There may be a small door protecting it.
- Before removing the card, stop any recording and properly shut down the camera.
- Press the card’s eject button next to the slot to release the card.
- Gently pull the card out without forcing it.
- Avoid touching the gold contacts on the card and store it in a protective case.
Safely ejecting the card avoids any risk of corrupting the data before transferring the files.
Step 2: Connecting the CFast Card to the Computer Via USB
Next, you need to connect the CFast card to your computer in order to access the files:
- Insert the CFast card into the CFast card reader.
- Plug
- Plug the card reader into an available USB port on your computer.
- Check that the card reader is properly detected by your computer.
- The CFast card should now appear as an external drive on your computer.
With the CFast card plugged into the card reader and connected via USB, your computer can now interface with the card and prepare for file transfer.
Step 3: Copying Files to Your Computer
Now you’re ready to copy the video files from the CFast card over to your computer:
- On your computer, navigate to the external CFast card drive.
- Select and copy all files you want to transfer.
- Paste or move the copied files to the designated folder on your computer you created earlier.
- You can choose to transfer either your original camera files, or consolidate/transcode media for easier editing.
- A progress bar will indicate when the transfer is complete.
The exact steps for copying files depends on your specific computer operating system. But generally you can select, drag, and drop files like any other copy/paste operation.
Step 4: Ensuring Successful Transfer of Files
Once the file transfer appears to be complete, it’s important to verify that all files copied over properly:
- Compare the number and size of files on the card vs your computer.
- Spot check some clips at random to confirm they open and play properly.
- Check the integrity of important files using checksums or data verification software.
- Scan for any transfer errors and re-copy any missing or corrupt files.
- Delete the transferred files on the CFast card to free up its remaining space.
- Verifying your files were transferred without issue ensures you don’t lose any important footage before beginning your edit or project.
Editing Your Transferred Files
Introducing Editing Software: Premiere, DaVinci
Once you’ve successfully transferred your video files from the Blackmagic camera to your computer, you’re ready to start editing!
Two of the most popular professional editing programs compatible with Blackmagic cameras are:
- Adobe Premiere Pro – A industry-standard NLE for Windows and Mac.
- DaVinci Resolve – Blackmagic’s own advanced color grading and editing software.
Both offer extensive tools for creatively editing projects shot on Blackmagic cameras. Premiere leverages tight integration with other Adobe apps. DaVinci excels at color correction and multi-camera editing.
Basic Editing Techniques for Your Video Files
Here are some common edits you can start applying to your footage in either Premiere or DaVinci:
- Arranging clips sequentially on a timeline.
- Trimming clips to remove excess footage.
- Adjusting colors, exposure, etc with built-in filters.
- Adding transitions between clips.
- Overlaying graphics, text, and visual effects.
- Audio editing like levels, normalization, mixing.
- Exporting your final edited video to share.
The software will provide many more advanced tools. But these basics will help you turn your raw footage into professional-looking videos.
Tips for Maintaining Your Blackmagic Camera and Its Files
Regular Firmware Updates
Blackmagic frequently releases firmware updates for their cameras that add new features and fix bugs. It’s important to keep your camera firmware up to date for the best performance.
Check the Blackmagic website periodically and install any new updates available for your camera model. Follow the release notes so you know what changes each firmware version includes. Keeping current firmware ensures compatibility and unlocks the full potential of your Blackmagic camera.
Proper Handling of CFast Cards to Prevent Data Loss
Since CFast cards store all your recorded video files, it’s crucial to handle them with care to prevent data loss or corruption:
- Avoid exposing cards to liquids, dust, or extreme temperatures.
- Insert/remove cards carefully without forcing them in the slots.
- Store in protective cases when not in use.
- Format cards in-camera vs on your computer.
- Retire cards that show signs of wear and damage.
- Don’t edit or modify card contents directly from your computer.
Treating CFast cards gently and using best practices will minimize the risk of file errors or lost footage down the road.
Organizing Your Files for Easy Access
It’s helpful to develop an organized file storage system on your computer so you can easily find specific Blackmagic clips when needed:
- Create a master folder for each project or client.
- Use subfolders to separate raw footage from edited exports.
- Add relevant metadata like dates, locations, descriptions.
- Standardize consistent file naming conventions.
- Back up important project folders regularly.
Investing time in organizing your transferred files will maximize efficiency during future editing sessions and collaborations.
Conclusion
Recap of the File Transfer Process
In summary, transferring files from your Blackmagic camera involves:
- Removing the CFast card from the camera.
- Connecting the card to your computer via a USB card reader.
- Copying the video files to a designated folder on your computer.
- Verifying successful transfer of all footage.
- Editing the clips using professional software like Premiere or DaVinci Resolve.
Following this straightforward workflow ensures you can access your footage for post-production while keeping the original files safely backed up.
Emphasize Importance of Regular File Transfer and Maintenance
Offloading footage from your Blackmagic camera is essential to utilize your video to its full potential through editing. It also reduces the risk of permanently losing valuable files due to card corruption or damage. Developing consistent practices for file transfers and storage provides major long-term benefits.
Your Blackmagic camera is an investment. So properly maintaining firmware, media cards, and file organization will extend its lifetime while allowing you to produce amazing work.
Q: How do I transfer files from my Blackmagic camera?
A: To transfer files from your Blackmagic camera, you have a few options depending on the model and your preferred method of file transfer. You can either use a card reader to transfer the files from the camera’s memory card to your computer or connect the camera directly to your computer via USB.
Q: Can I transfer files directly from the Blackmagic camera to my computer?
A: Yes, you can transfer files directly from your Blackmagic camera to your computer by connecting the camera to the computer via a USB cable. This method allows you to access and transfer the files without the need for a card reader.
Q: Do I need any special software to transfer files from my Blackmagic camera to my computer?
A: No, you do not need any special software to transfer files from your Blackmagic camera to your computer. Once your camera is connected to the computer, it will be recognized as an external storage device, and you can simply copy and paste the files from the camera to your desired location on the computer.
Q: How do I transfer footage from a Blackmagic camera to my computer using a card reader?
A: To transfer footage from a Blackmagic camera to your computer using a card reader, follow these steps: 1. Remove the memory card from your Blackmagic camera. 2. Insert the memory card into the card reader. 3. Connect the card reader to your computer via USB. 4. Your computer should recognize the memory card as an external storage device. 5. Open the memory card on your computer and copy the footage files to your desired location.
Q: Can I transfer files from a Blackmagic cinema camera to my computer using a card reader?
A: Yes, you can transfer files from a Blackmagic cinema camera to your computer using a card reader. The process is the same as transferring files from other Blackmagic cameras. Simply remove the memory card from the cinema camera, insert it into a card reader, and connect the card reader to your computer via USB.
Q: Can I transfer files from a Blackmagic camera to my computer via USB?
A: Yes, you can transfer files from a Blackmagic camera to your computer via USB. Connect the camera to your computer using a USB cable, and your computer will recognize the camera as an external storage device. You can then access and transfer the files directly from the camera to your desired location on the computer.
Q: Is it possible to transfer footage from a Blackmagic camera without removing the memory card?
A: Yes, it is possible to transfer footage from a Blackmagic camera without removing the memory card. By connecting the camera to your computer via USB, you can access and transfer the files directly from the camera’s internal memory.
Q: Can I transfer video clips from a Blackmagic camera to my computer using a card reader?
A: Yes, you can transfer video clips from a Blackmagic camera to your computer using a card reader. Simply remove the memory card from your camera, insert it into the card reader, and connect the card reader to your computer via USB. You will then be able to copy the video clips from the memory card to your desired location on the computer.
Q: How do I transfer files from a Blackmagic camera to a Mac computer with USB-C ports?
A: To transfer files from a Blackmagic camera to a Mac computer with USB-C ports, you will need a USB-C to USB adapter. Connect the camera to the Mac computer using the USB-C to USB adapter, and the computer will recognize the camera as an external storage device. You can then transfer the files from the camera to your desired location on the computer.
Q: What is the best way to transfer files from a Blackmagic camera to a Windows 10 PC?
A: The best way to transfer files from a Blackmagic camera to a Windows 10 PC is to connect the camera to the computer via USB. Once connected, the camera will be recognized as an external storage device, and you can easily transfer the files from the camera to your desired location on the PC.
Q: Can I transfer files from a Blackmagic camera to a computer using a wireless connection?
A: No, Blackmagic cameras do not have built-in wireless capabilities for file transfer. The most common and reliable method to transfer files from a Blackmagic camera to a computer is by using a USB connection or a card reader.
- BMPCC 6K vs 6K Pro: The No‑Nonsense Buyer’s Guide - September 27, 2025
- Best Gimbals for BMPCC 6K in 2025: A Complete Guide - June 11, 2025
- Blackmagic Rec.709 LUT Download - June 11, 2025